Tuesday 29 April 2014

Ladybug Kitty

Today I want to show you this cute card I made using my Cameo machine for my Great Niece's Birthday next month. Keira will be 6 and is Hello Kitty crazy so I wanted to find something I could make using Kitty especially for her.


I came across this free cutting file on the September Ninth blog and the file can be found here and instantly thought it was ideal for Keira's Birthday card, so I cut out two of the base pieces in black so that I could score and join them together so the card would stand and I cut the rest of the pieces out in the appropriate colours (the pieces are actually shown in the necessary colours on the actual cutting file for reference for ease of use).

I layered the pieces up using the photo on the blog as reference to make sure I popped them in the right places (was very easy to do) then I added the little red bow around the flower, the little wooden ladybug which I had in my stash and a few little gems to add a little sparkle for a very quick but oh so cute card which I'm sure Keira is going to love.

I am entering this in to the Cameo With Carley Challenge Blog-Cute or Whimsical

Wednesday 23 April 2014

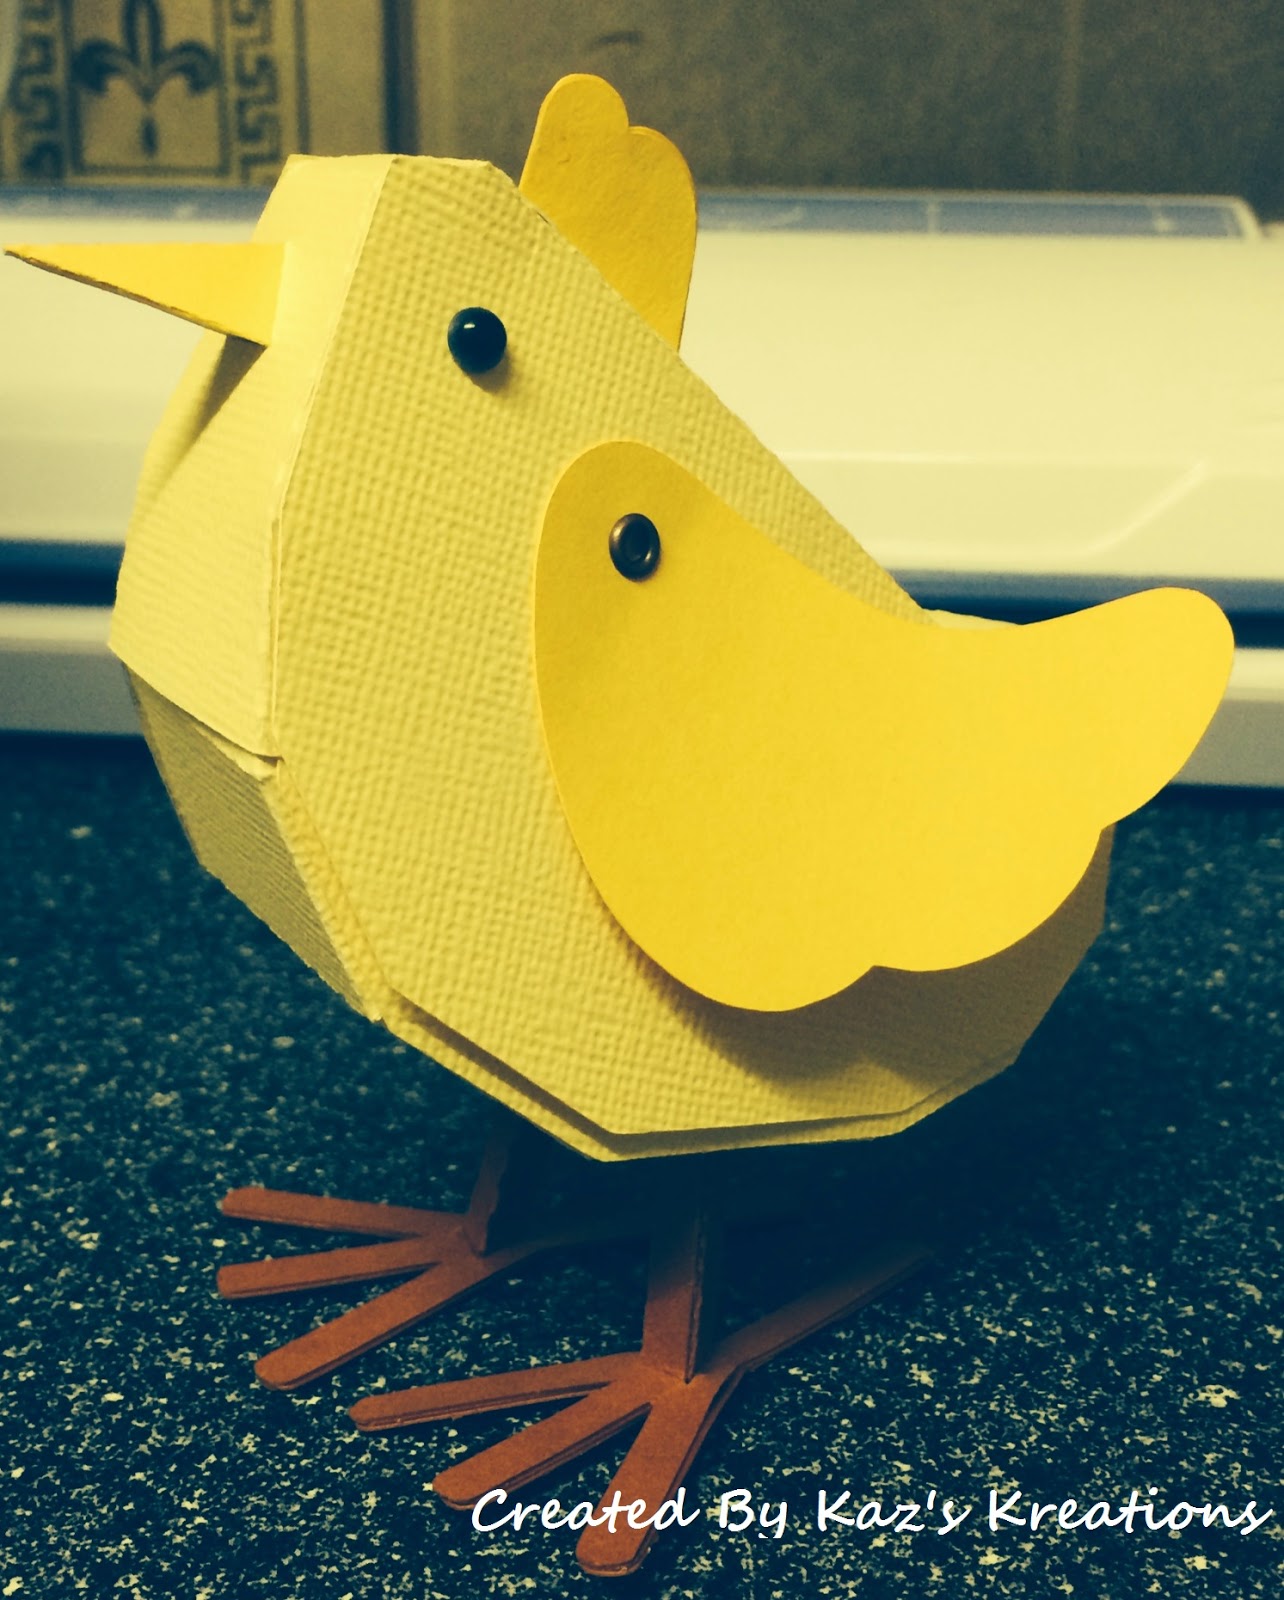
Easter Chick

Today I want to show this cute little box that I made on the Cameo machine using a file from the Silhouette Store, it's by Snapdragon Snippets and it can be found here.


I started of by cutting all the parts out on the Cameo Machine using American Crafts card stock and then assembling them following the instructions given on the website here. I used the strong red double sided tape for the body and wet glue for all the other parts as I find this holds stronger. I chose not to add the ribbon which is optional and I also used little black pearls for the eyes rather than the card layers, but I love the finished item I have to say.

I found certain parts a little fiddly, but that could well have something to do with my fat fingers lol, and having made one I would probably change the order of assembly to suit me next time, but he goes together very well.

I am entering this in to the Cameo With Carley Challenge Blog-Cute or Whimsical


Friday 18 April 2014

Faux Leather Note Book

Today I wanted to show you my first effort using Sheena Douglass's faux leather technique. I did this while visiting my dear friend Zoe, but you can find out how to do it for yourself here. I wanted to make a little note book for my Mum to jot things down and so I chose to use dark pink tones for the ink rather than the brown tones which I think actually looks more leather like.


So after making the cover following the instructions given I cut several pages of pale pink lightweight paper to fit inside and sewed them in to the cover using a waxed thread, I added the ribbon and bow to the side of the note book and I found this lovely sentiment topper in my stash. A few flowers and pearls added using glue gel and you have a very pretty and cheap to make little gift. Why not give it a try yourself, it's very easy to do and looks fabulous!


Wednesday 16 April 2014

Christmas Fun Challenge-card For A Man/Anything Goes

My second post for today sees the midway point in the April challenge over at Christmas Fun and the theme for this month is either a card for a man or anything goes, so pretty much anything you fancy really as long as it's Christmas related lol. I chose to go with a card for a man as I do tend to struggle with those and hey it's a challenge right?

I have had this CD since it was released but haven't used it before, but I bought it with the men in mind and so this was the perfect opportunity to put it to the use it was intended.


So I started by printing off the topper, and 2 contrasting papers onto white lightweight card and then a piece of white A4 card which I scored at the half way point and then again in half on one side to get the fold back section. I cut out the topper, layering circle and the scalloped circle using dies and also a matching layering circle and a smaller white circle for the inside of the card and I cut some mats from the same red card for layering the backing paper on to before mounting this to the card. I added some snowflake again cut in the red card and card candi to the center of these and the plain circle to the inside for the sentiment.

I hope you will join in with the challenge and I'll look forward to showing you another project next month.


Just For Fun April Challenge-Easter

Today sees the midway point in the Easter themed challenge over at Just For Fun and I decided I wanted to make something fun to fit the theme. I have recently purchased a Silhouette Cameo cutting machine and I am totally in love with it, so I thought it would be good to make up one of the many fabulous designs that are available in the store.

I chose to use a design by Snapdragon Snippets because I thought it was a fun design and very cute.


 I started by resizing the design to the full length of A4 card stock and I cut the main card shape in bright yellow card, I then cut the main body and the decoupage layers of the bunny in kraft card and the white belly and tail using an off cut of card from my bits box. I chose to cut the 'Happy Easter' in red card along with his bow. I then proceeded to put him together, using foam pads for the decoupaged pieces and for some height to the sentiment and I added the gem to his bow and a black pearl for his eye to finish.

I hope you will join in with us, and that you enjoyed my project for this month.


Tuesday 1 April 2014

Seemacrafts April Challenge

Today see the start of the April challenge over at Seemacrafts and the theme for this month is vintage. I have been trying to use some of the stash I've had for ages and cam across this topper in one of my folders, so I have no idea where it originated, but I thought it was lovely.


I started with an 8x8 white card blank and found the piece of lilac backing paper in my stash which I lightly distressed around the edges using a tattered rose ink pad. I mounted the topper on to some silver mirror card and then on to some lilac cardstock which I found in my bits box. Some lilac ribbon, card candi and a few roses were added for the finishing touches.

Seema is running a competion to see if you can tell her who has used one of her digital stamps on their project this month, with a prize of 3 digital stamps of your choosing, the winner of this months challenge will receive 4 digital stamps of their choice so I hope you will join in with us.